
Organizations that manage multiple FortiGate devices often rely on standardised configurations to streamline deployment and simplify ongoing management. This approach is especially effective when using the same FortiGate models, as configurations can be easily replicated and deployed across environments.
However, there are important differences between the Gen1 and Gen2 versions of the FortiGate 90G series that can complicate configuration, particularly with regard to FortiLink.
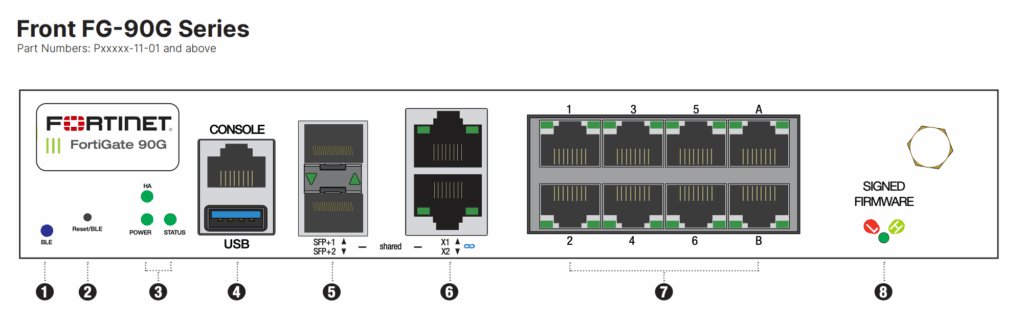
Key Differences: 90G Gen1 vs. Gen2
FortiGate 90G Gen1
- FortiLink is configured on interfaces A and B, as is typical.
- WAN1 and WAN2 share a 10 Gbps interface.

FortiGate 90G Gen2
- FortiLink is now preconfigured by default on interfaces X1 & X2, which are the renamed shared 10 Gbps WAN interfaces.
- Interfaces A & B are available but not assigned to FortiLink by default.
⚠️ Note: This architectural change also means HA (High Availability) cannot be configured between Gen1 and Gen2 devices. However, this article focuses solely on FortiLink limitations.
The Catch: A & B Can’t Be Used for FortiLink
While interfaces A & B are physical, selectable, and appear available in the GUI or CLI, they cannot be added to a FortiLink aggregate interface in Gen2 models.
- Interfaces X1 & X2 are automatically included in the default FortiLink aggregate interface on Gen2.
- Attempting to remove X1/X2 from FortiLink and assign A & B instead results in various configuration errors such as:
Input value is invalid.
* Node_check object fail! for interface-name a. X
* Value parse error before 'a'
Uploading a modified configuration with A and B defined as FortiLink members fails also with the error:
"set" "member" "a" "b" @ 211:system.interface.fortilink:value parse error (error -651)What This Means for You
If your standard configuration deployment relies on using interfaces A & B for FortiLink, the Gen2 FortiGate 90G will break that approach.
Workaround (Unofficial)
While there’s no official fix—since this is an intentional design choice—a workaround exists.
Disclaimer
This is an unofficial and unsupported workaround. It was only tested briefly in a lab environment. Use it entirely at your own risk. For best results, apply it to a fresh install, as existing configs may reference fortilink in multiple places.
1. Download the FortiGate configuration file.
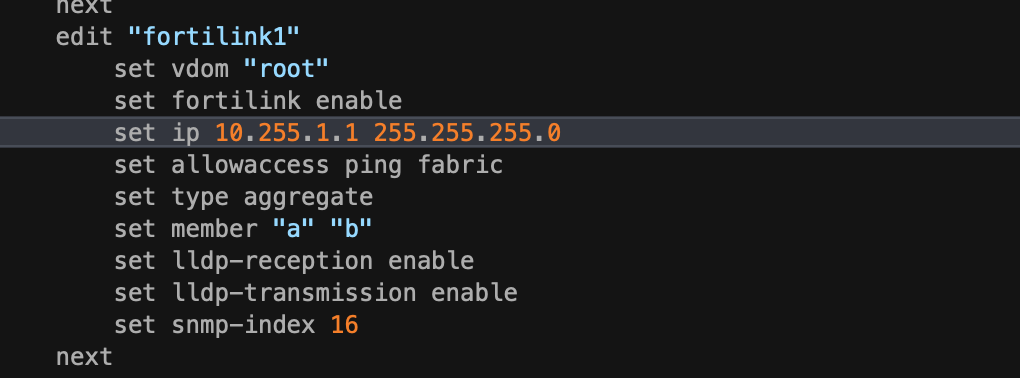
2. Rename the fortilink interface to something else, like fortilink1, in the configuration file.
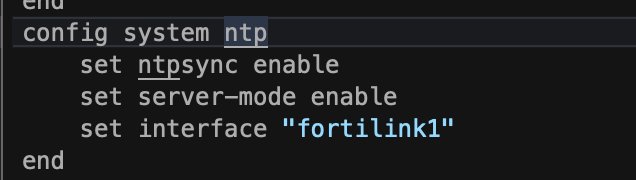
3. Update any references to fortilink under config system ntp:
4. Update fortilink under config system dhcp server:

Done: Re-import the configuration. No errors should appear on import:

Final Note
The Gen2 interface changes appear to reflect a design shift toward higher-speed connectivity. While this impacts legacy FortiLink configurations using A & B, the workaround provides a possible path forward.
For more on the shared interfaces and ha issues, see:
Fortinet Tech Tip: Understanding Shared Media Interfaces
HA unsupported between different FortiGate 90G and 91G series hardware generations
![]()
