
FortiWeb v6.4 starts to support the integration with Let’s Encrypt. This allows you to automatically generate server certificates alleviating the need to upload private certificates.
The administration guide gives you some information on how to request those Let’s Encrypt certificates but in our opinion the configuration guidelines are not sufficient.
So we tried to give some more information on how to configure FortiWeb to obtain a server certificate from Let’s encrypt and how to use them in the server policy.
Step 1: Adding a certificate request for Let’s encrypt
The steps for creating a certificate request and the related requirements are pretty well documented by Fortinet. Please refer to the administration guide.
Step 2: Adjust the Server Policy
Make sure that “HTTPS Service” is set to “HTTPS” and the “Certificate Type” is configured to “Letsencrypt”. Then choose the certificate request you have created in step 1.
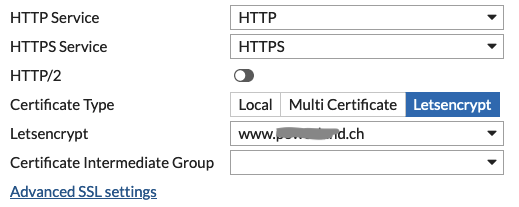
If you are working with an “HTTP Content Routing” Rule or you are running several Webserver behind one public IP, then you have to use a “SNI Policy”. You will find this setting within the “Advanced SSL settings” (refer to picture above). Here you have to enable “Enable Server Name Indication” and create an appropriate “SNI Policy”.
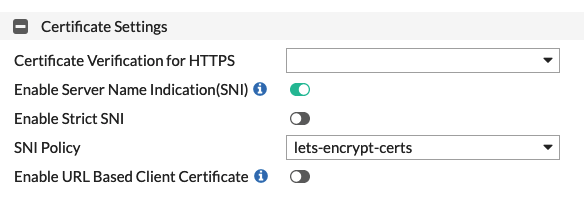
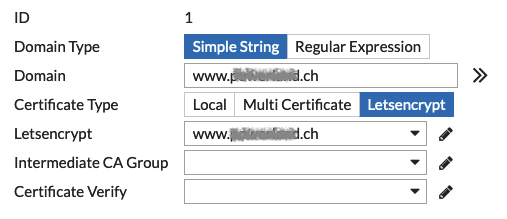
If you do not want to create the “SNI Policy” from this menu, you can navigate to “Server Objects > Certificates > SNI”. Here you can create “Inline SNIs” (FortiWeb in Reverse Proxy mode or True Transparent Mode) or “Offline SNIs” (FortiWeb in Offline Inspection mode or Transparent Inspection mode). Make sure that you add entries for all servers where “Certificate Type” is set to “Letsencrypt”.
Step 3: Make it work!
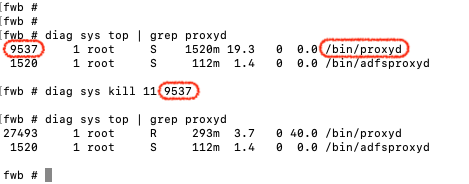
It seem’s that there is still an issue with this new feature. After your configuration certificate requests are not answered successfully by Let’s Encrypt and FortiWeb will use the default FortiWeb certificate instead of the one from Let’s Encrypt. A quick&dirty fix is to restart the proxyd process with the help of the CLI. Make sure you are doing this after configuration step 1&2.
Find the process id <pid> with “diag sys top | grep proxyd”. Then kill the process with “diag sys kill 11 <pid>:
Once this is done you should be able to use your webserver with a proper server certificate.
![]()