With the possibility to include external lists from third parties via the feature “External Dynamic List EDL”, this opens up many possibilities to restrict your own security policies even better and to prevent access to the TOR network.
In the following tutorial I will show you how to configure the list of TOR exit nodes, which can be found at https://check.torproject.org/torbulkexitlist as a list of IP addresses.
1. Create External Dynamic IP List
First, create a new EDL.
Objects > External Dynamic Lists > Add
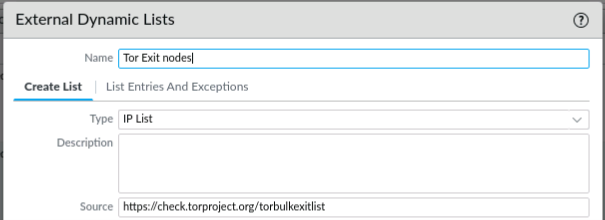
The list of TOR Exit Nodes and further information can be found here:
Blog Article: https://blog.torproject.org/changes-tor-exit-list-service
Source URL List: https://check.torproject.org/torbulkexitlist
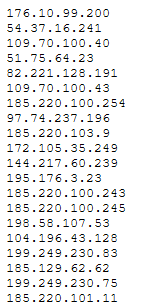
As type you should choose the “IP List” selection. This assumes a list with one IP per line. If you look at the provided IP list, this is the case:
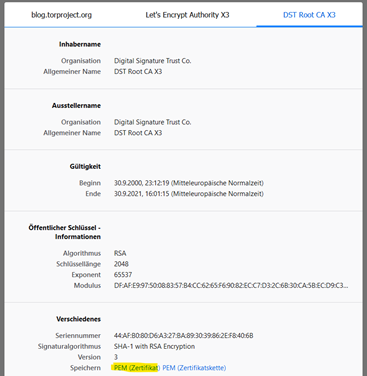
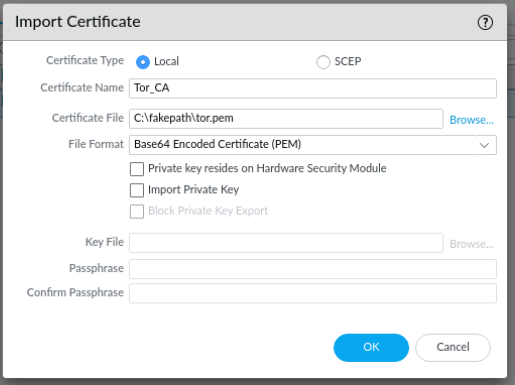
2. Download the CA Certificate from the website as .pem format.
Since the list is provided via HTTPS and therefore signed with a certificate, the Palo Alto Firewall must trust the CA certificate which signed the server certificate. This is solved via the import of the CA certificate into the firewall.
Please use your browser capabilities to display and download the CA certificate.
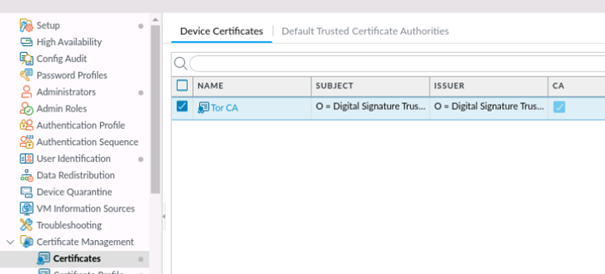
3. Add the CA certificate to firewall’s the certificate list
After you have downloaded the CA certificate, you can upload it to the firewall’s certificate store.
Device > Certificate Management > Certificates > Add
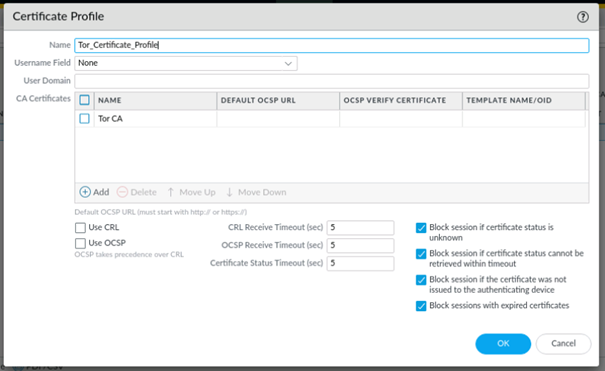
4. Create a certificate profile and add the Tor_CA certificate
Now that the certificate has been uploaded to the firewall’s certificate store, it can be used in a certificate profile.
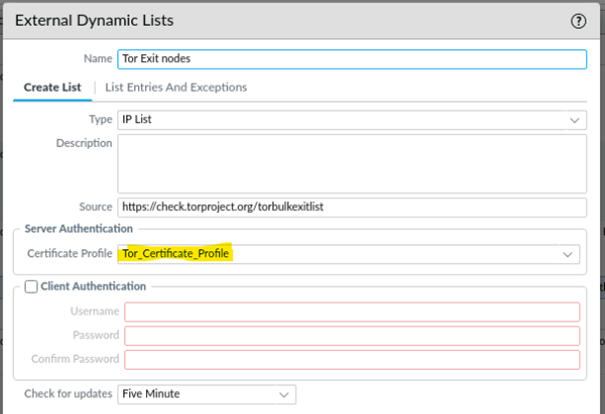
5. Add certificate profile in EDL list
Now the certificate profile with the CA certificate can be used in the configuration of the EDL list.
Also note the update frequency of the list, if the list contains new values. The new entries are added automatically with the update, and a Commit is not necessary.
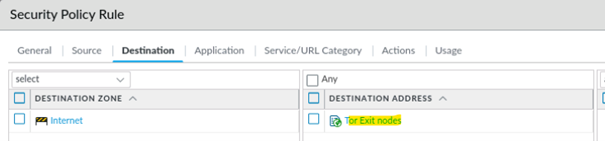
6. Add EDL in Security Policy
Now everything is prepared and the EDL list can be inserted in the security policy as source or destination address object.
It makes sense to use a security policy with the action Block at the beginning of your security policies.
Policies > Security > Add

7. Commit changes
Save the changes so that they become active.
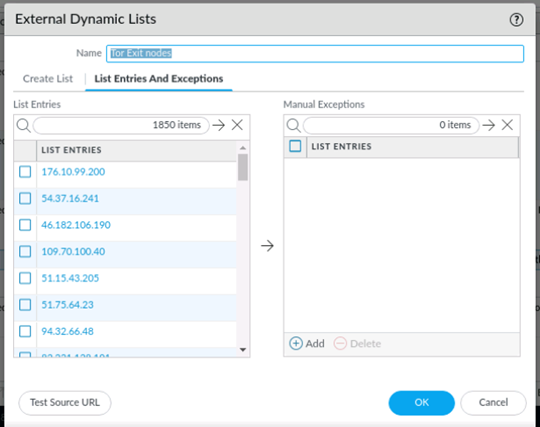
8. Verify if EDL list contains entries
After the initial synchronization of the list, you can check its content as follows.
Objects > External Dynamic Lists > Edit Tor Exit nodes > List Entries and Exceptions
Check if list contains entries: